If you, like me, are interested in baking sourdough bread and wondering how to store your sourdough starter to prevent wastage, don’t worry — there are various ways worldwide to store your sourdough starter. You will choose the method based on whether you want to use it immediately for baking or preserve it.
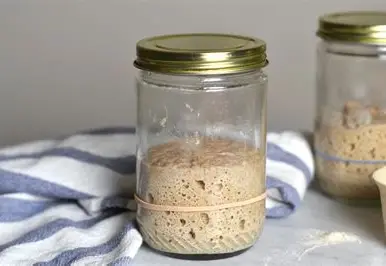
Table of Contents
How to Store Sourdough Starter (Fresh) for Active Baking
If you use the starter daily, you can store it in a jar on your kitchen counter. Be sure to keep your storage jar out of direct sunlight. First, cover the jar tightly with a loose-fitting lid. If you’re keeping the starter on the counter, you need to feed it every 12 hours to make sure it stays active and ready to use.
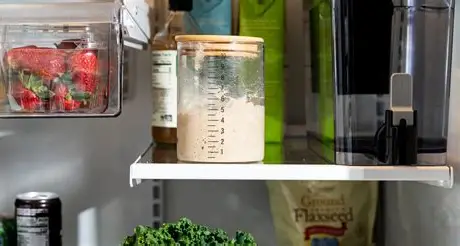
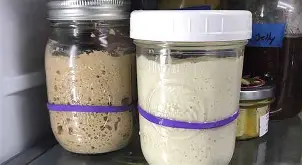
Fridge Storage for Sourdough Starter
If you want to store your starter rather than use it every day, the best way to store it is in the refrigerator. Just feed it as usual. Make sure to keep the lid on tightly and store it in the refrigerator. Your starter will slow down. Feed it once a week while it is in the refrigerator. Take it out when you are ready to bake. Feed it at least 10 to 12 hours before you start baking. If you are not planning on baking, feed it once a week and put it back in the refrigerator.
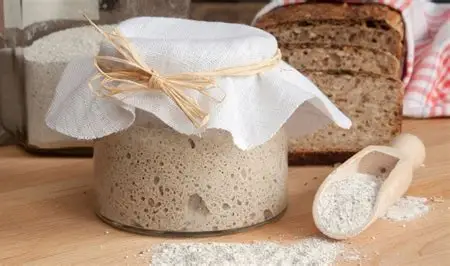
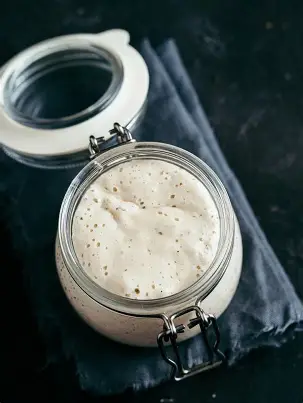
Method 1: Storing Sourdough Starter at Room Temperature
Keeping your starter at room temperature is the traditional method. This method is useful if you bake almost every day.
What You Need:
- A clean glass or plastic jar
- A kitchen towel or loose-fitting lid
- A rubber band (optional)
- Flour and water
Steps:
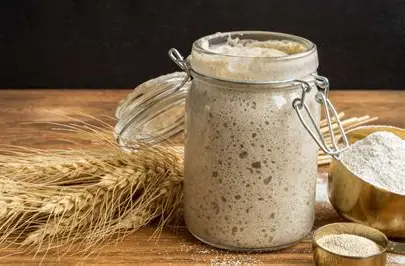
- First, choose a clean glass or plastic container that is large enough to accommodate your starter. A 1–2-quart jar is best because it gives the starter room to expand as it ferments.
Before storing, feed your starter with equal parts flour and water, usually 1/2 cup flour to 1/4 cup water, or whatever you prefer. Give it a good shake. - Before storing, feed your starter with equal parts flour and water, usually 1/2 cup flour to 1/4 cup water, or whatever you prefer. Give it a good shake.
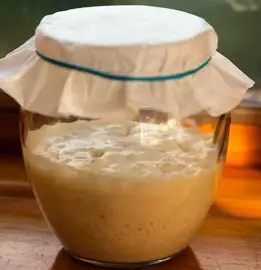
- Cover the jar with a kitchen towel or a loose-fitting lid. The advantage of a towel is that it allows air to circulate, which helps wild yeast thrive, while a lid does not. A loose lid or plastic wrap is acceptable, but it is important to avoid a tight seal that will trap gas.
- When storing the jar on your kitchen counter, make sure it is out of direct sunlight. A room temperature range of about 70°F (21°C) is ideal for your starter to stay active.
- Every 12 hours, discard half of the starter (about 1/2 cup), and re-feed it with equal parts water and flour. This keeps the starter fresh, active, and helpful in baking.
- The starter is now ready. When you want to bake, simply remove the desired amount of starter and feed the remaining starter. Leave it for at least 12 hours before baking.
Method 2: The Fridge Method – Perfect for Casual Bakers
What You Need:
A clean glass or plastic jar with a lid
A rubber band
Flour and water
Refrigerator
Steps:
- When storing your starter, use a clean jar. A jar with a lid is best if you plan to refrigerate it to prevent any unwanted bacteria from getting in.
- Before storing in the refrigerator, mix together the same amount of flour and water. Let it sit at room temperature for 1 or 2 hours to reactivate.
- Once your starter is open and activated, put a lid on the jar.
- Don’t close the lid tightly; leave a small gap. This will allow some air to escape. You can cover the jar with plastic wrap or a cloth instead of a lid.
- Then, place the jar in the refrigerator.
- The cold will slow down the fermentation process, and your starter will become inactive.
To feed your starter only once a week, remove it from the refrigerator, leave half of the starter, feed it with flour and water (usually about 1/2 cup flour and 1/4 cup water), stir well, and let it sit at room temperature for about an hour before returning it to the refrigerator.
Take your starter out of the refrigerator before baking. Let it sit at room temperature for at least 4-6 hours before feeding it. Feed it again 10-12 hours before using it in your recipe to ensure it is active and ready.
Learn More About: Store Sourdough Starter
Tips for Method 1🙁Storing at Room Temperature)
Feed Consistently: Feeding on a regular schedule (every 12-24 hours)
Mind the Temperature: Be careful not to let your starter get too hot – your kitchen should be 75°F / 24°C. You may need to feed more frequently. Cold rooms slow things down. Extreme temperature fluctuations disrupt yeast activity and can also stunt growth.
Choosing the Right Jar: A wide-mouthed glass jar works best. It gives the starter room to grow and breathe. The starter needs space to grow. You don’t want to overfill the jar, or it will have less room to rise, and the fermentation process will be disrupted.
Loosely Cover: You don’t have to seal the jar tightly. Cover it with a thin layer of cloth, a loose lid, or a kitchen towel. Let it breathe but keep out dust and dirt. A tight lid will trap carbon dioxide, which can throw off the balance.
Mark the Level: Mark with a rubber band marker or put a rubber band around the jar. This will make it easier to see how much has grown later. If it’s not growing as much, it needs to be fed more often.
Everyday Feed at the Same Time: Feed your starter at the same time every day. This way, you will get the best results. Don’t let the feeding interval exceed 12 hours. Watch for signs of overproduction. If the starter rises, falls, and smells strong or like wine, it is hungry – it is time to feed it.
Feeding Ratio: Feed your starter an equal amount of flour and water. For example, one cup of flour to one cup of water. Use filtered water. Use lukewarm water and filter it if possible. This will make your starter the best.
Bubble making: If there are visible air bubbles in the active starter within 2-3 hours of feeding, it means fermentation is taking place. If it doesn’t bubble after several hours, it’s a good sign that your starter needs more time or more food.
Testing: If you want to check if your starter is ready, do the float test. Take a spoonful of your starter and drop it into a glass of water. If it floats, it means it is light and airy, and it is ready to cook. If it sinks, it may need some more food.
Tips for Method 2: (Fridge Storage)
Feed It Before Storage: Always feed your starter fresh food before storing it in the fridge. This ensures it has a good amount of fuel until the next feed. After that, leave it out at room temperature for 2-3 hours.
Choosing A Jar: Always choose a clean jar. If you notice any lumps, transfer to a fresh jar. Store in a plastic container or an airtight container to retain moisture and prevent your starter from drying out. Choose a large container. A mason jar or any container with a secure lid works well.
Don’t Seal It Too Tight: When closing the container, don’t make it too tight. Otherwise, the starter will create carbon dioxide and can’t escape, which can create pressure, which can cause overflow.
Feed Within One Week: Feed it once a week. Take it out, let it warm up to room temperature for about 2-3 hours, and then feed it with fresh flour and water. After feeding, let it sit out for a bit before putting it back in the fridge.
Keep it away from strong odors: Your starter is a living thing and can absorb odors from other foods in the refrigerator. Keep it away from things like garlic, onions, or strong-smelling cheeses.
Plan for baking: Take your starter out at least 1 day before baking and give it 1-2 feedings at room temperature to fully wake it up.
Keep your starter in the back of the fridge. If you keep it near the door, it will be exposed to temperature fluctuations when you open the fridge. A stable, cool environment is best for your starter to remain dormant.
BackUp: If you plan to store your starter in the refrigerator for an extended period, it’s wise to have a backup. You can either freeze a portion of it or set aside a small amount to ensure you don’t lose your starter if something goes wrong. This will provide you with peace of mind for future use.
Don’t Worry About a Little Liquid: Don’t be concerned if you notice a grayish liquid on top, known as “hooch.” It simply indicates that your starter is hungry. You can either remove or shake it, then proceed to feed it.
You Will Enjoy:
“Spoonful Delights: Easy Soup Appetizers to Warm Up Any Meal”
Sourdough for Breakfast: Easy & Healthy Recipes to Start Your Day